Opening words

Dear Visitor,

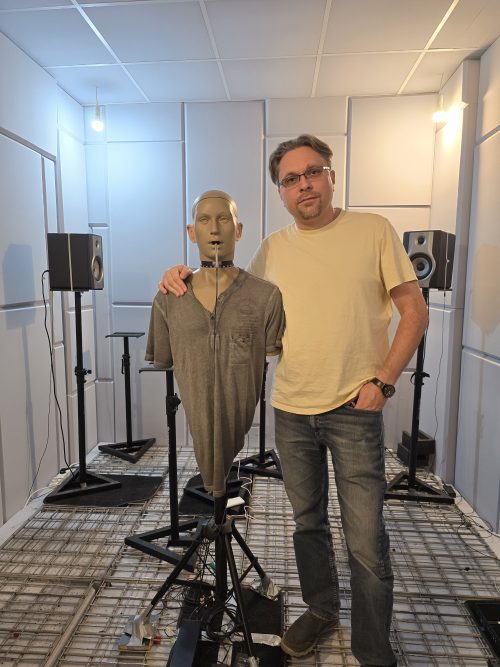
I’m Alex Radzishevsky, welcome to my digital abode. I occasionally update this space whenever time allows.

I’ve been into the computing world for 35 years, I’ve seen and been a small part of its evolution. I held membership in Fidonet (2:461/113) and operated my own dial-up BBS back in the 90s. I’m still a fan of tracker music and the demoscene. And yes, I still use the old Norton-style file commander on my modern Windows computer.

You won’t find me on big social platforms such as Facebook et al. I like the more old-school ways of talking: email, chat, phone call, or meeting face-to-face. For me, these feel more real and hold more substance than the ephemeral interactions of modern-day ‘social’ networks. Plus, I have more fun things to do with my time.

If you want to get in touch, just send me an email. If you’re curious about my life, take a look around this site. I’ve shared what I’m okay with everyone knowing. And if you’re here for work reasons, my LinkedIn is the place to go. If you just want to see some pictures, check out my photo album. I add new ones when I can.

You’ll find my latest posts below.

Warm regards,
Alex Radzishevsky.


>>> Click to read the full post...

Permanently disabling Windows Defender “real-time protection” in Windows 11

If you, like me, do not want your Windows 11 computer’s CPU resources spent on antivirus processes and wish to disable Windows Defender completely, you may have found various methods to disable its components via Group Policy (gpedit.msc) and the Windows Registry (regedit.exe). However, starting from version 23H2, Windows will “self-heal” and restore any such settings upon restart. This can be frustrating, and I disagree with Microsoft deciding what my computer does on my behalf.

Here is how to permanently disable the real-time antivirus protection in Windows 11:

Create a folder on your disk:
For example, C:\Scripts.

Create a new PowerShell script file:
Open Notepad or any text editor.
Save the file as turn-off-rt-protection.ps1 in the C:\Scripts folder.

Add the following line to the script:
Set-MpPreference -DisableRealtimeMonitoring $true

Configure the script to run at startup using Task Scheduler:
Open Task Scheduler (you can search for it in the Start menu).
Click on “Create Task” in the right-hand Actions pane.

General Tab:
Name: Enter a name for the task (e.g., “Disable Real-Time Protection”).
Security options: Check “Run with highest privileges”.

Triggers Tab:
Click “New…” to create a new trigger.
Begin the task: Select “At log on”.
Settings: Choose “Any user” or specify a user.
Check “Delay task for:” and set it to 1 minute.
Click “OK”.

Actions Tab:
Click “New…” to create a new action.
Action: Select “Start a program”.
Program/script: Enter powershell.exe.
Add arguments: Enter -ExecutionPolicy Bypass -File "C:\Scripts\turn-off-rt-protection.ps1">>> Click to read the full post...

The creative panic as AI takes over

Artists and writers are in a panic — they have discovered that their works are being used to train generative AI. A surge of loud discussions arises in the media when it turns out that generative AI, such as ChatGPT and others, have been using materials from artists, photographers, writers, and journalists without their permission. Now, with generative AI competing with them and taking their bread, everyone is suddenly up in arms.

Allow me to offer my perspective on this. The uproar about somehow restricting the use of materials for AI training seems laughable and evokes nothing but a sardonic smirk from me. Just as no one could stop the spread of pirated software through Fidonet, BBS, and IRC chats 30 years ago, and later through internet forums, eDonkey, a now through Torrents, and the Darknet, no one will be able to control what materials AI developers use to train their models. It is foolish to think that someone will develop “bulletproof” algorithms to modify graphical and other materials to confuse AI during model training. AI developers will devise countermeasures to bypass these, without a doubt.

It’s equally naive to think that some legislation will genuinely hinder the use of certain materials in training sets. This will not happen. Instead, developers will take additional technical and algorithmic measures to keep using available materials indirectly, and also ensure that querying their AI models does not explicitly reveal traces of the materials used for training. This is a logical and inevitable engineering … >>> Click to read the full post...

My interview with MMN Magazine

I’m thrilled to share that MMN Magazine recently interviewed me about www.AudioTag.info, its underlying acoustic fingerprinting technology, my other audio technologies including watermarking solutions available at www.AudioWatermarking.com and some more.

A big thank you to my friends at MMN Magazine and to Peter Bokor personally for this wonderful opportunity. You can check out the full interview here: https://mmn-mag.hu/2024/06/03/audiotag-challanging-shazams-fingerprinting

>>> Click to read the full post...

AWT technology secures new US Patent

I’m pleased to share some news from my small audio DSP software house at www.AudioWatermarking.com. I have just been granted US Patent 11,978,461 — a key addition to the growing collection of innovations, marking another significant personal and professional milestone in my journey at www.AudioWatermarking.com.

This is the third major patent in the line of patents protecting my core DSP technologies focused on audio watermarking and acoustic fingerprinting. Our suite of tools, including Audio Watermarking Tools (AWT) and Audio Fingerprinting Tools (AFT), is at the forefront of forensic audio watermarking, steganography, and acoustic fingerprinting software solutions. This patent is another small personal achievement in my humble engineering career. It is also a step forward for AWT technology and the trust and confidence it provides its users. It’s moments like these that reflect the cumulative effort of countless hours of work and the unwavering support from family and customers.

We look forward to continuing to innovate and provide our clients with state-of-the-art solutions that meet their evolving needs. Your support fuels our continued passion and commitment to enhancing the security and reliability of audio DSP technologies.

Please visit www.audiowatermarking.com to explore how AWT technologies might help meet your needs.
Permanent link to the patent at USPTO website.

>>> Click to read the full post...

Avoid charges for AWS Elastic IP’s — How to automatically update the IP address of a DNS record of a domain defined in Amazon Route53 from an EC2 instance

Your EC2 instance is assigned a fixed public IP from a list of Elastic IPs. But Amazon charges a considerable amount of money for the Elastic IP. Is there a way to automatically update the IP address of a DNS record defined in Amazon Route53 from the EC2 instance? Yes, there is, and it’s not hard. You can write a “bootstrap” script that is executed when the instance is started. The script will update the public DNS record according to the public IP of the instance.

1. Allow EC2 changing Route53 records

Detailed instructions for creating an IAM role

Log into your AWS management console.

Proceed to AIM (“Identity and Access Management”). Click on Roles. Click on Create role.

Select AWS service as the trusted entity type.

Select EC2 for the Use Case, then select EC2 (“Allows EC2 instances to call AWS services on your behalf”)

In the Permission policies, select AmazonRoute53FullAccess.

Click on Next: Tags (optional step, you can add tags to organize and manage your role).

Click on Next: Review.

Name your role. Choose a name that makes sense for its purpose, like EC2Route53UpdateRole.

(Optional) Add a description that explains the role’s purpose, like “Allows EC2 instances to update Route 53 DNS records.”

Review your choices and click on Create role.

Finalize and use the Role

After creating the role, you need to attach it to your EC2 instance:

  • Go back to the EC2 dashboard.
  • Select your instance.
  • Choose
>>> Click to read the full post...

Make MacOS running faster in VMWare

Here is how you can accelerate MacOS running in VMWare virtual machine in Windows 10/11.

The key performance factor: MacOS VM must run with “Virtualize Intel VT-x/EPT or AMD-V/RVI” enabled, otherwise it will run slowly.

You may not be able to enable this checkbox if your processor does not support virtualization. You need to consult with your CPU documentation to figure that out. For example, for Intel i7-10700K, we can see that the virtualization is supported:

If your CPU supports virtualization, you still may experience the following error message when enabling the needed feature in VMWare:

If it happens, do the following:

Reboot, go to BIOS and make sure that:

  • Intel Virtualization is enabled
  • Intel VT-d is enabled

Boot into Windows.

Under Start, search for “Core isolation”, and turn it off:

Under Start, search for “Turn Windows features on and off”, and then:

  • disable “Hyper-V”
  • disable “Virtual Machine Platform”

Reboot.

Go to ‘cmd’, and run the following command: systeminfo

At the very end of the report, if you see this:

then you are good to go.

However, if you see this:

then run ‘cmd’ as administrator, and run the following command:

bcdedit /set hypervisorlaunchtype off

Reboot.

Once done, make sure that the virtualization under ‘systeminfo‘ is reported as:

>>> Click to read the full post...